Logitech G400s microswitch replacement
This is not a full tutorial, but more like a (incomplete) documentation of the procedure. Assumption is that you have the tools and some skill at their use. I'd also like to apologize for the poor quality smartphone pictures used here.
#0 - Equipment and parts
Not all of this equipment is strictly necessary, but all of it is quite basic electronics repair stuff and certainly will make things easier.
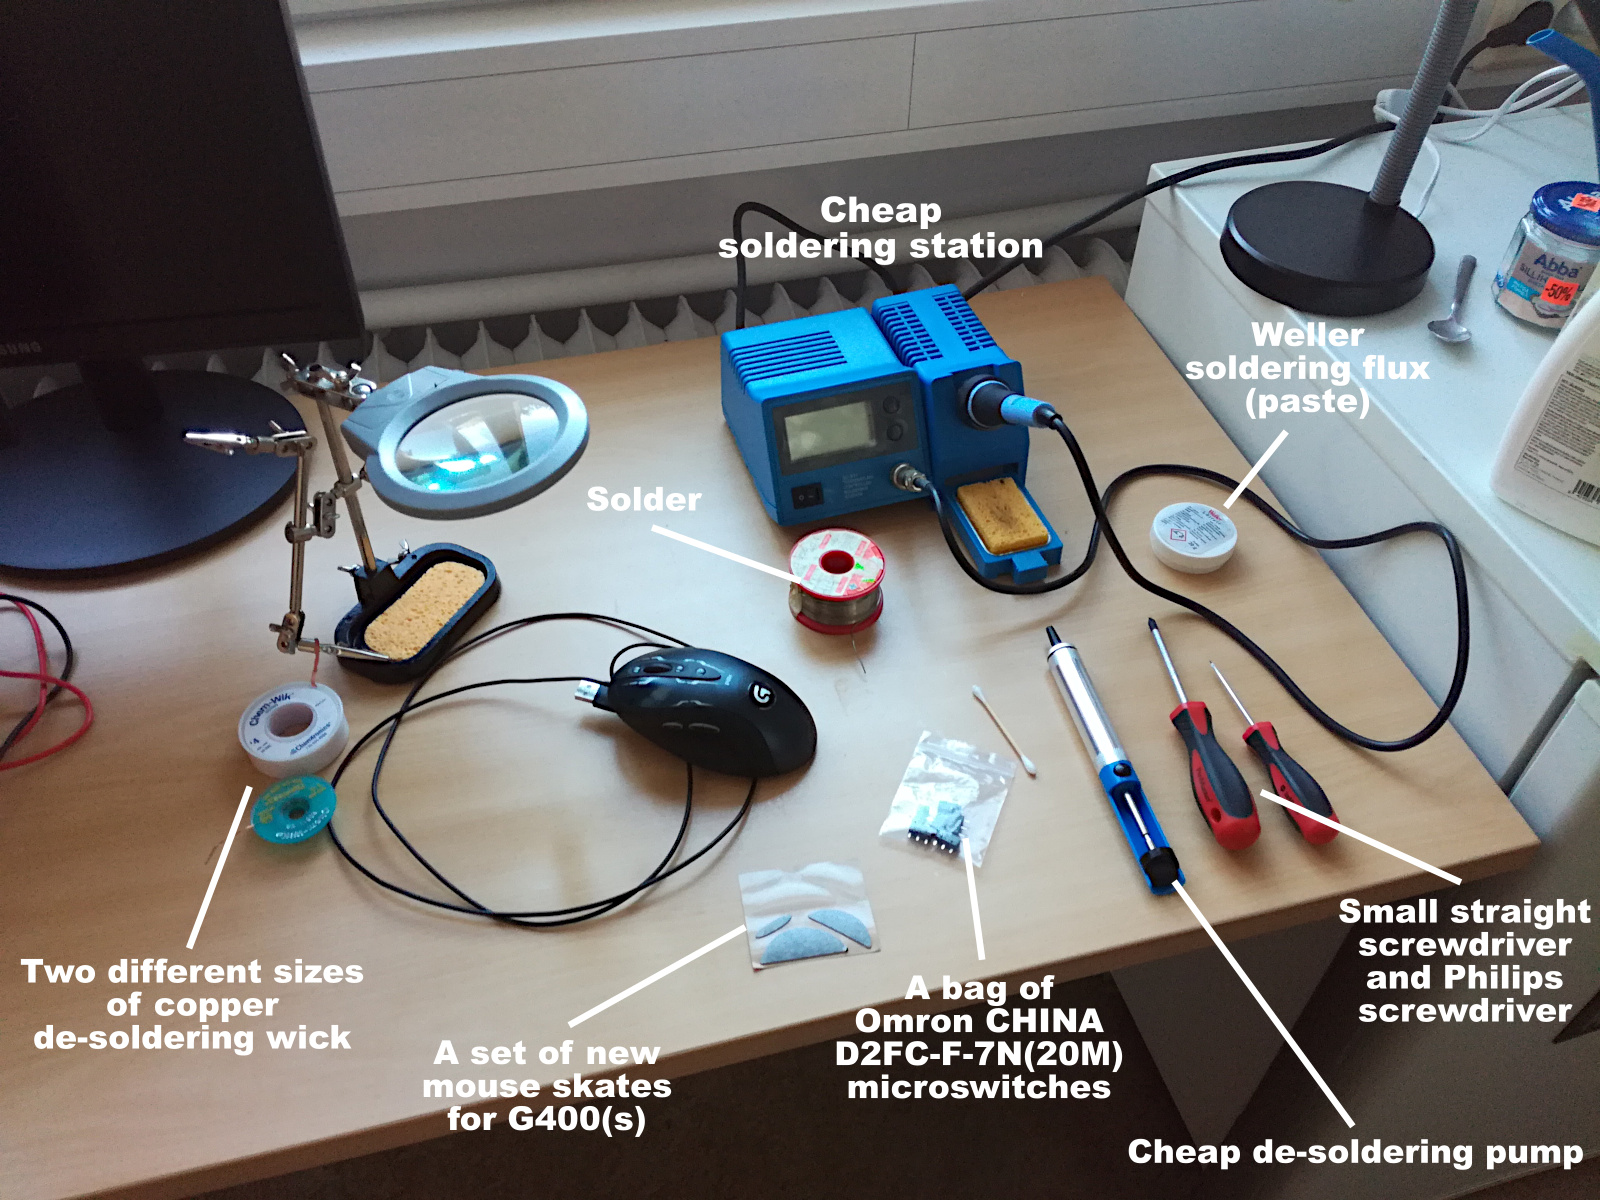
The actual parts (also shown in the picture above) I used were:
- A number of Omron (China) D2FC-F-7N(20M) microswitches. These are the model originally often used in Logitech mice (switches by other manufacturers can also be found), but some people may prefer to change to something else. Mouse Club lists some options. The usual sources for purchasing include Mouser, Digikey, Amazon, eBay, Aliexpress etc YMMV.
- A set of G400s/G400/MX-518 compatible mouse "skates" bought from an eBay seller.
#1 - External disassembly
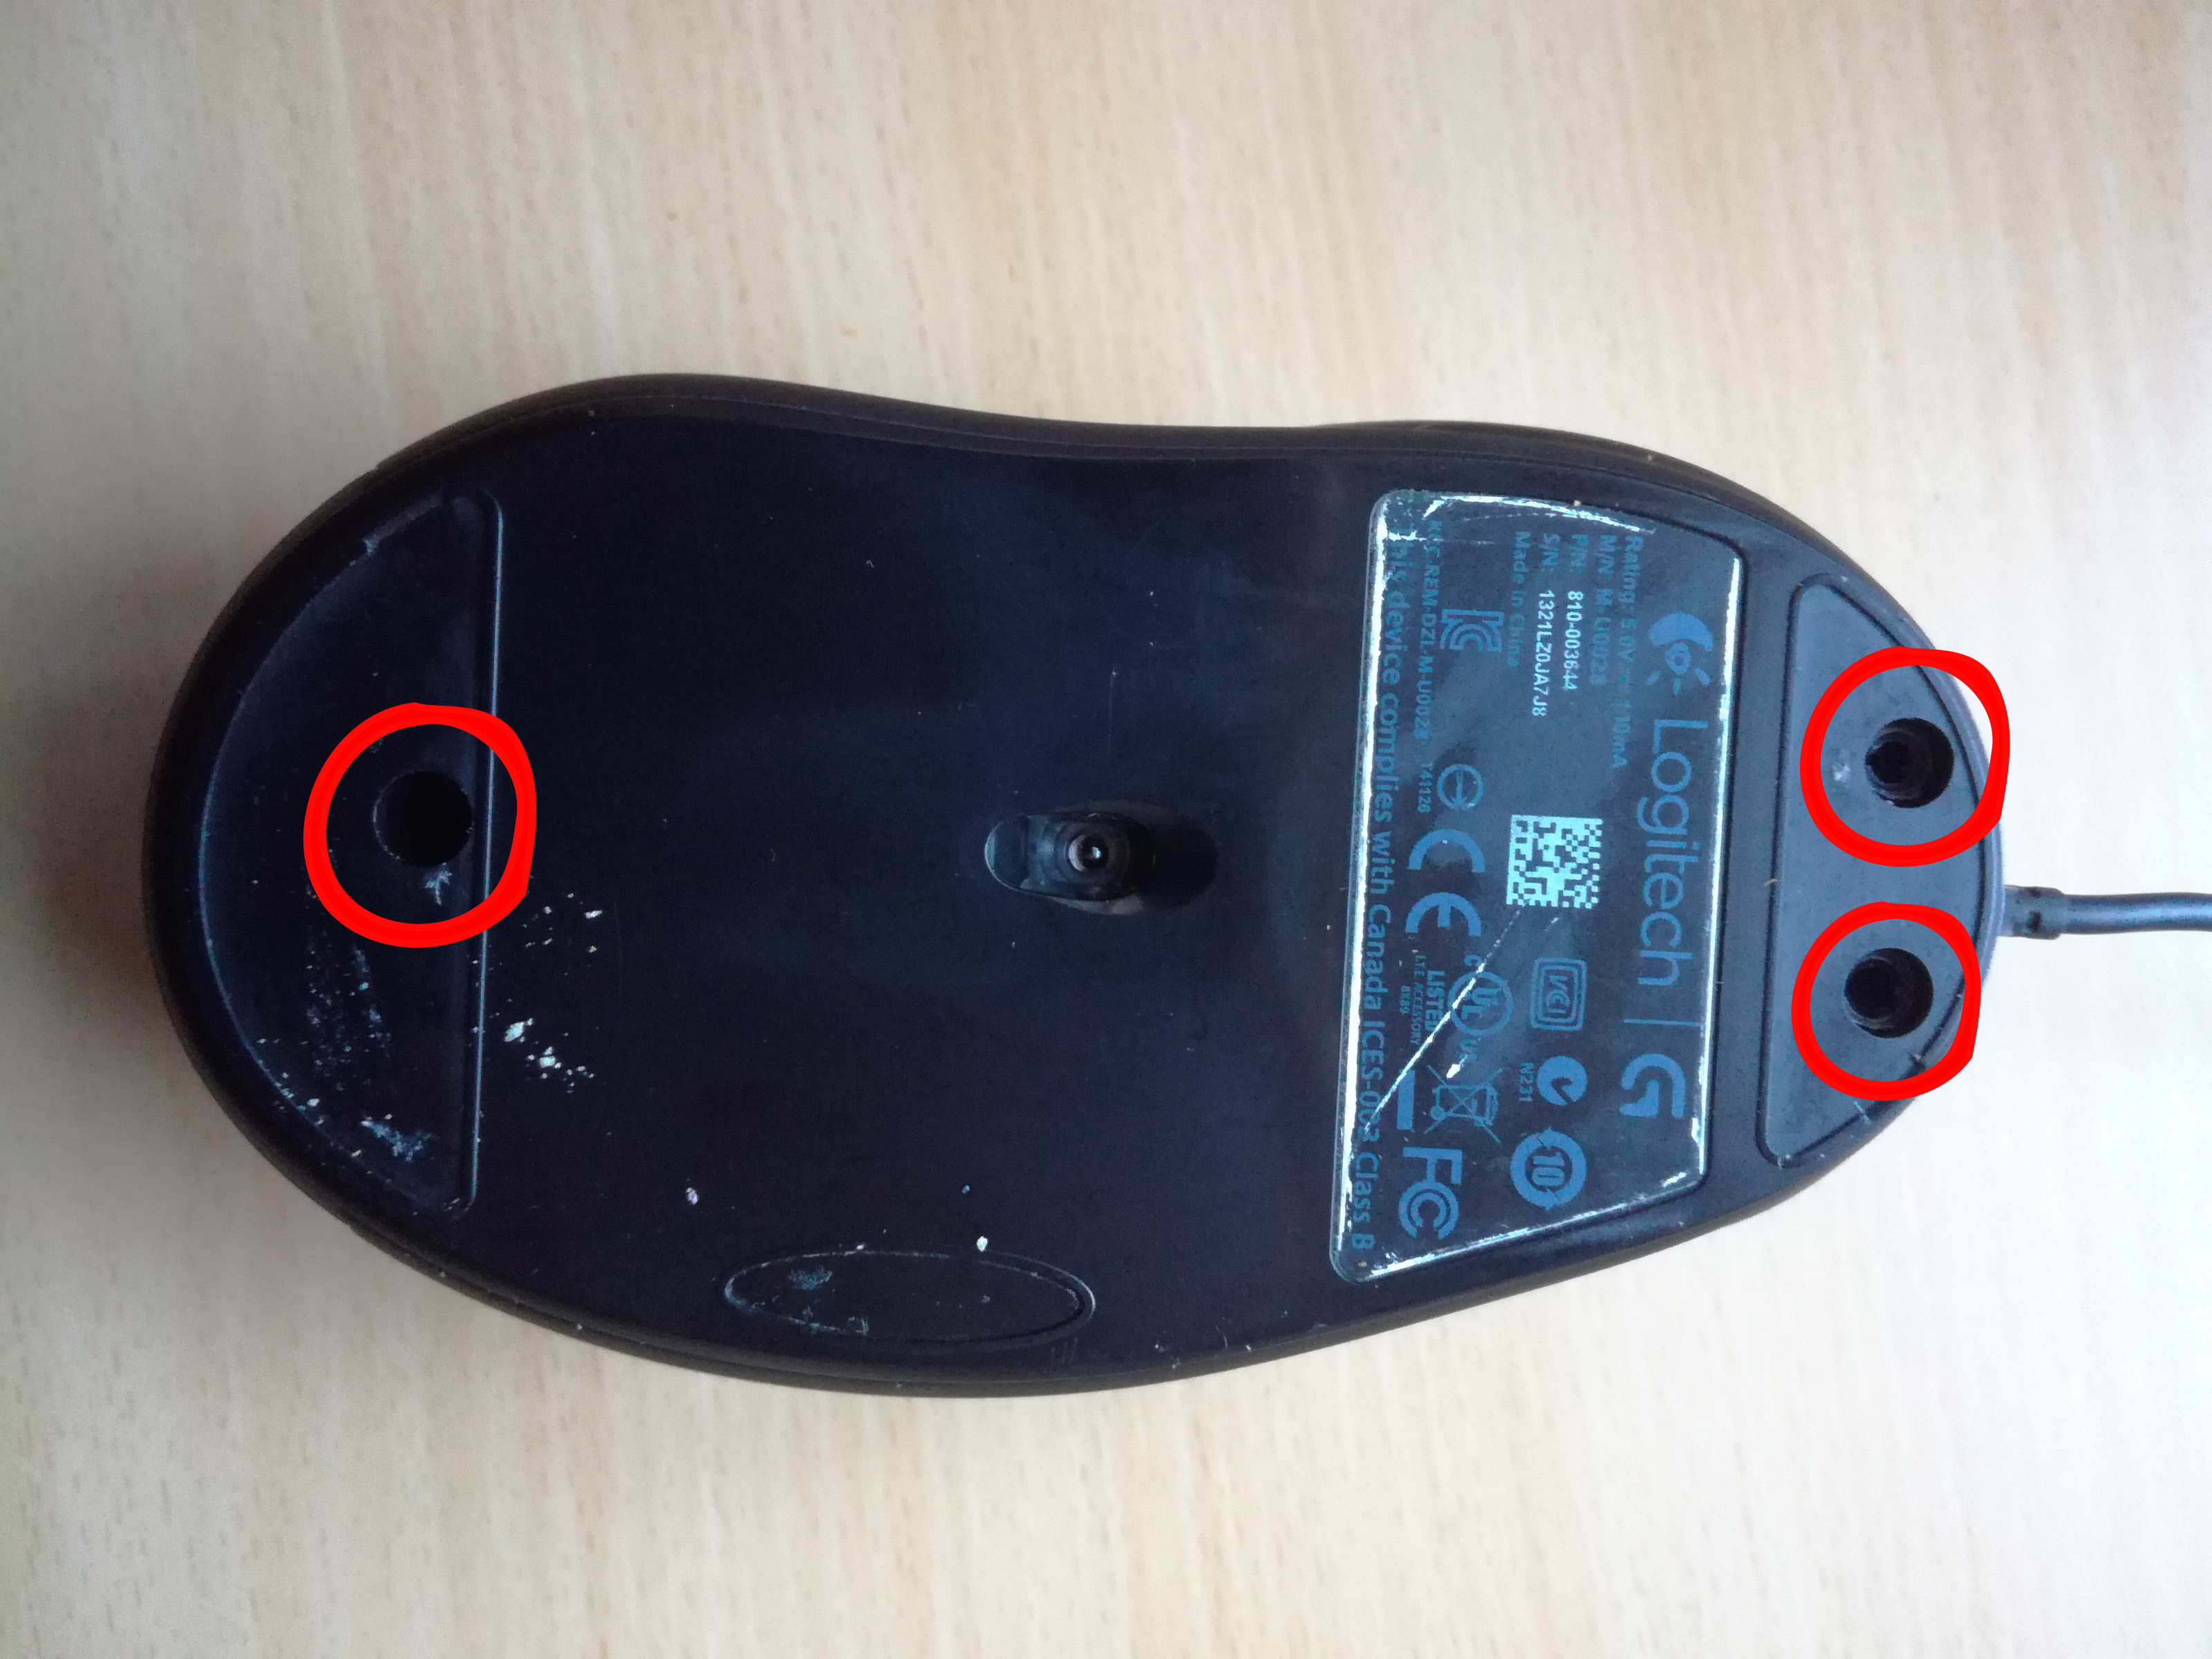
First, you need to remove the "skates" (e.g. the plastic slidey things glued to the bottom of the mouse) in order to access the 3 Philips head screws holding the mouse together. NOTE: It is quite likely that the "skates" will become unusable when removed, so you will probably want to get new replacements. Can be found from various sources, like eBay and Mouse Club. With proper material, you could make them yourself too, I suppose.
After removing the screws, the case should open easily.
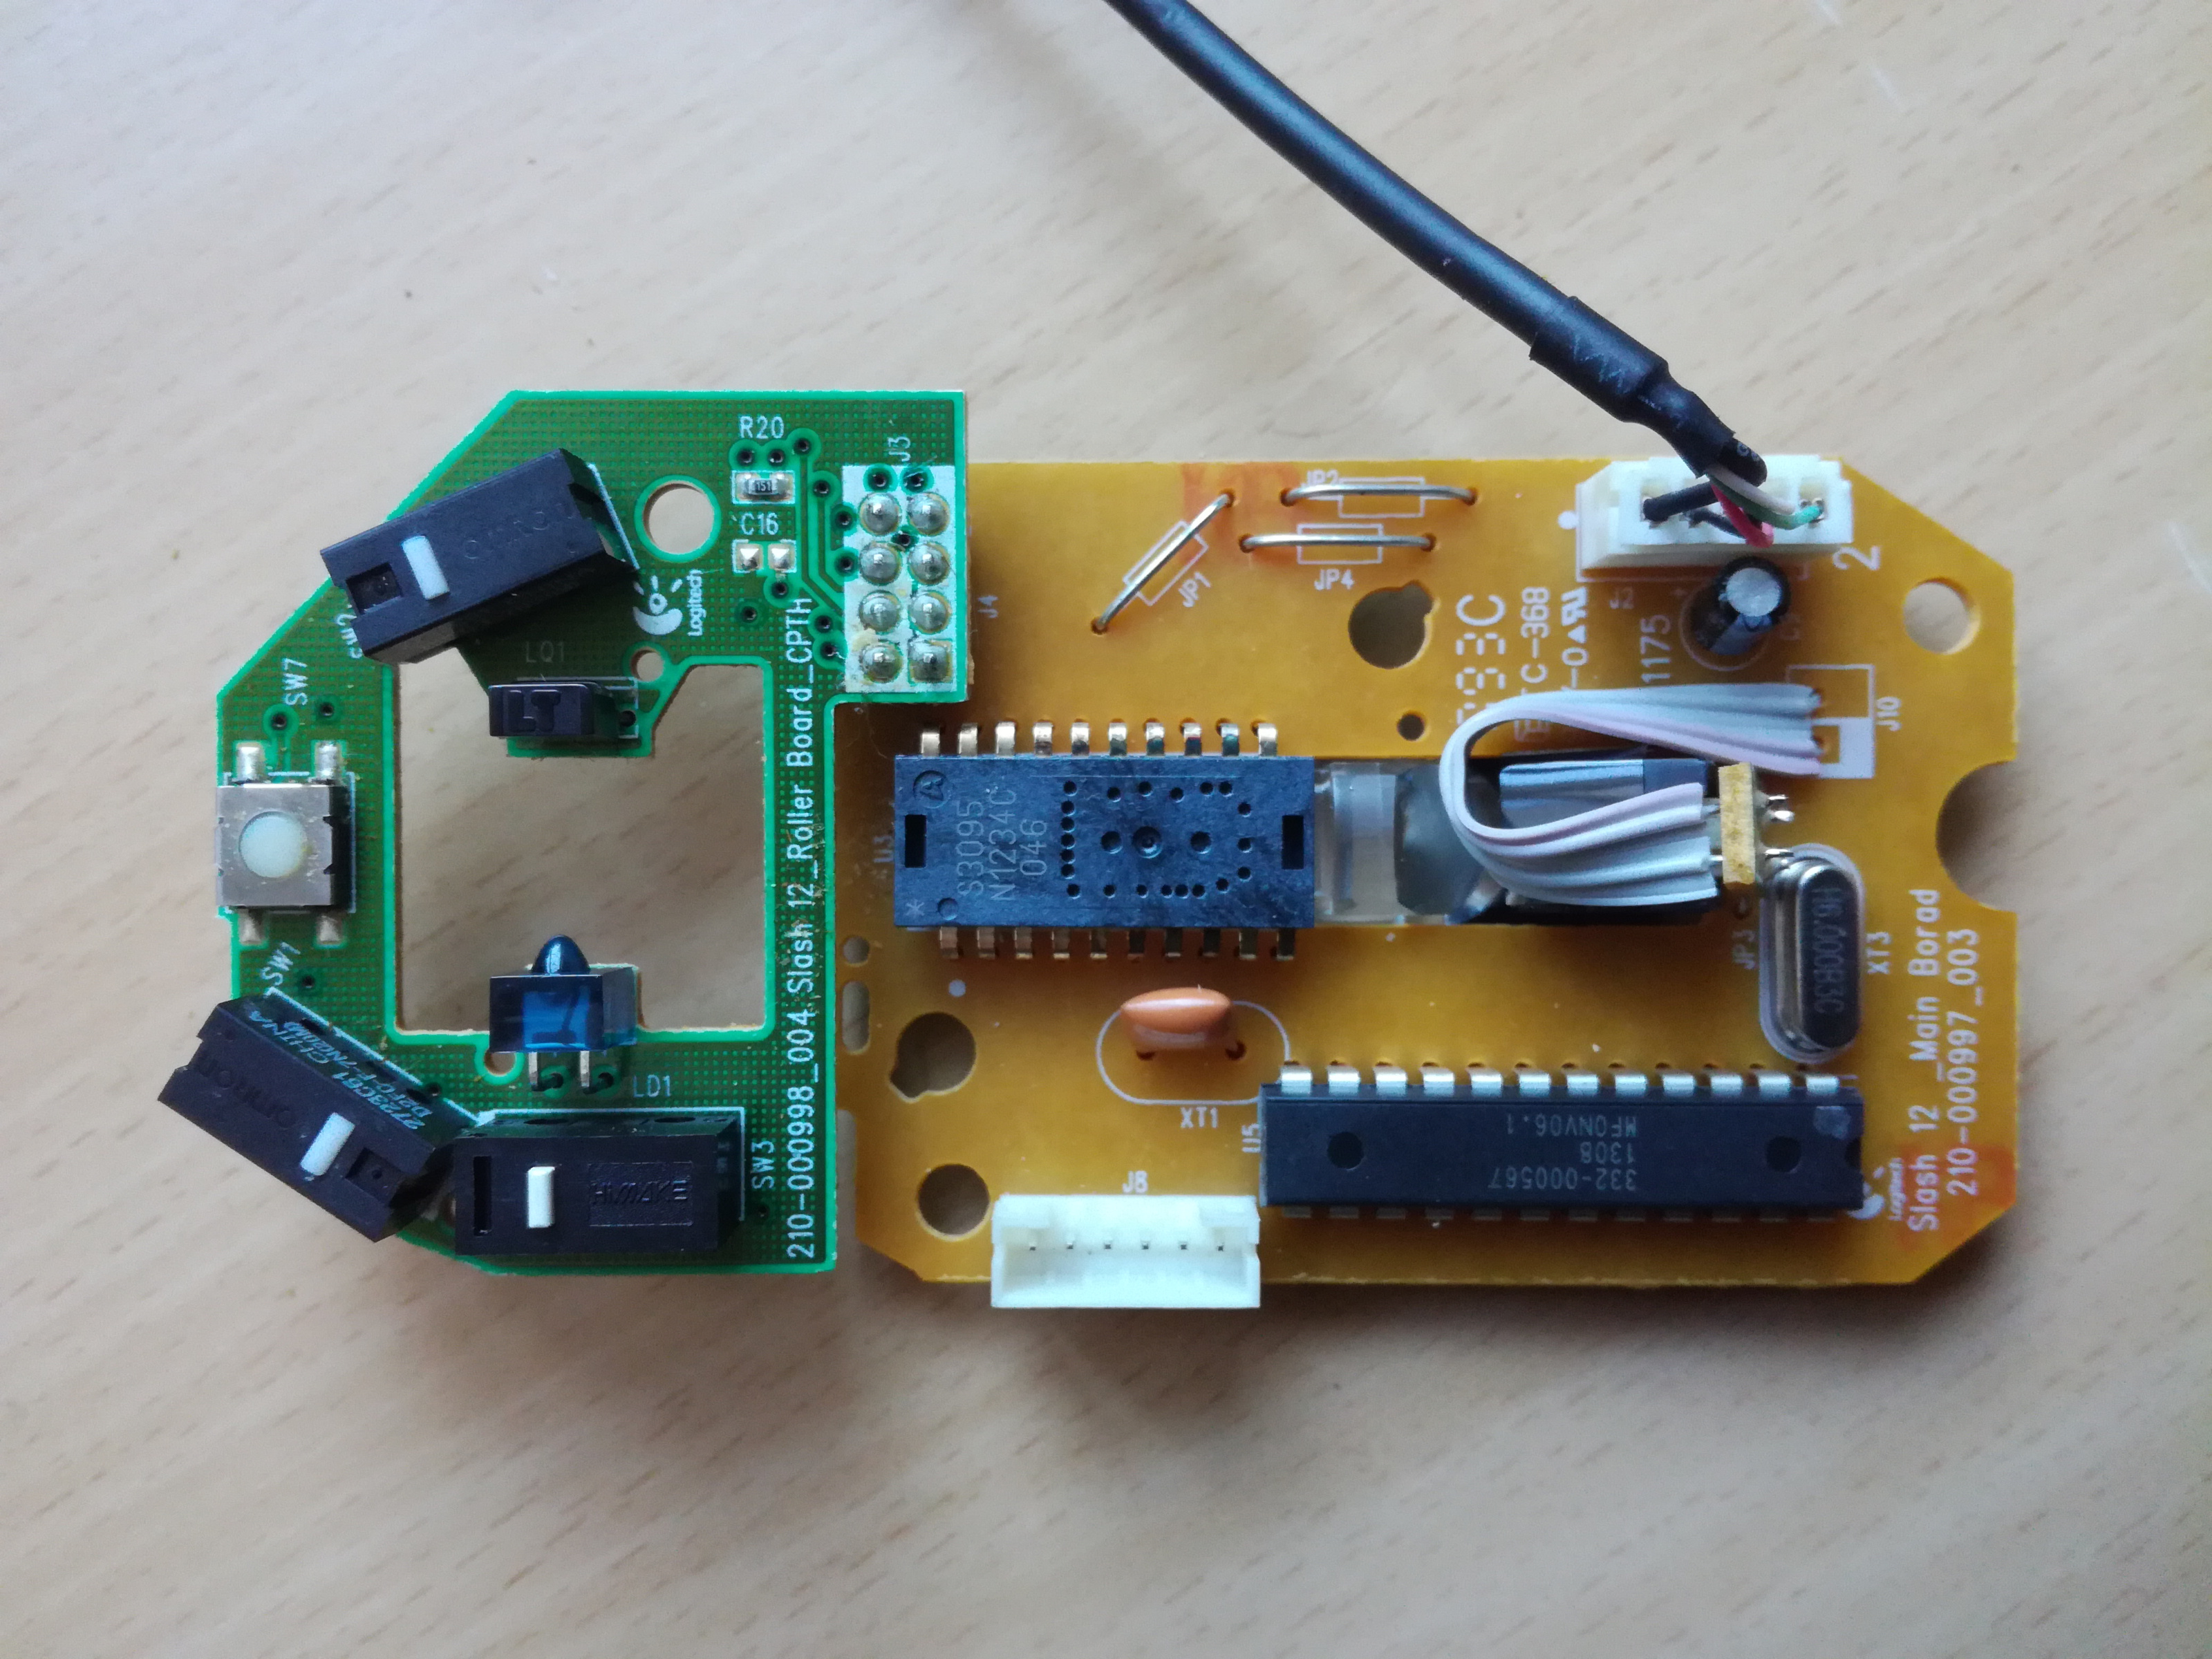
#2 - Internals disassembly
The order here is a matter of preference, but the first thing I did was disconnect the connector (1) for the wire to the top case and side buttons. The connector can be very tight and annoying to pull out, so some people might prefer to take the the PCB out first by removing 3 screws holding the PCB (2).
To remove the side/top buttons PCB assembly from the top case, remove the 2 screws (3). Further disassembly is optional, though may be easier for cleaning purposes etc.

#3 - Cleaning
At this point you probably should clean the mouse parts. Mine had a .. substantial .. amount of gunk, hair, dust etc accumulated during the ~7 years of use. NOTE: If you end up cleaning the scrollwheel assembly, you will want some kind of new grease for it. I have no idea what would be good to use, though. Personally I just used Q-tips etc to remove the excess dirt and left the old grease in.
#4 - Desoldering / removing old switches
After main PCB is removed from the case, desoldering can begin. I did not bother with disconnecting the USB cable, as the connector was very stubborn and it was not really necessary anyway. The procedure I used was as follows:
- Apply some flux to the 3 pins/solder joints of the microswitch on the bottom side of the PCB.
- Heat one solder joint and add a little bit of new solder, this makes desoldering easier.
- While desoldering pump is armed, heat up the solder joint and keep pump nozzle very close to the joint, then trigger the pump.
- Possibly repeat previous step if needed.
- Use copper wick to further remove solder, if needed. You may need to poke/wiggle the pins gently to get them loose.
- Repeat for the other switch / switches.
#5 - Soldering new switches
Basically very much same as desoldering.
- Insert one microswitch's pins through the PCB holes. NOTE! Make sure that you place the switch in correct orientation! The orientation is visible in the pictures, but also on the PCB silkscreen.
- Hold the PCB against a table or such, so that the switch is kept in place and flush against the PCB.
- Apply some flux to the pins and general area.
- Solder one of the pins .. repeat until all are done.
- Check your work, make sure that the switch is flush against the PCB and that the solder joints look okay.
- Use Q-tips to clean off flux etc.
#6 - Re-assembly
Nothing much to say, just do the disassembly in reverse. TIP: Do not put in the new skates before you test and ensure that the mouse is working! :)
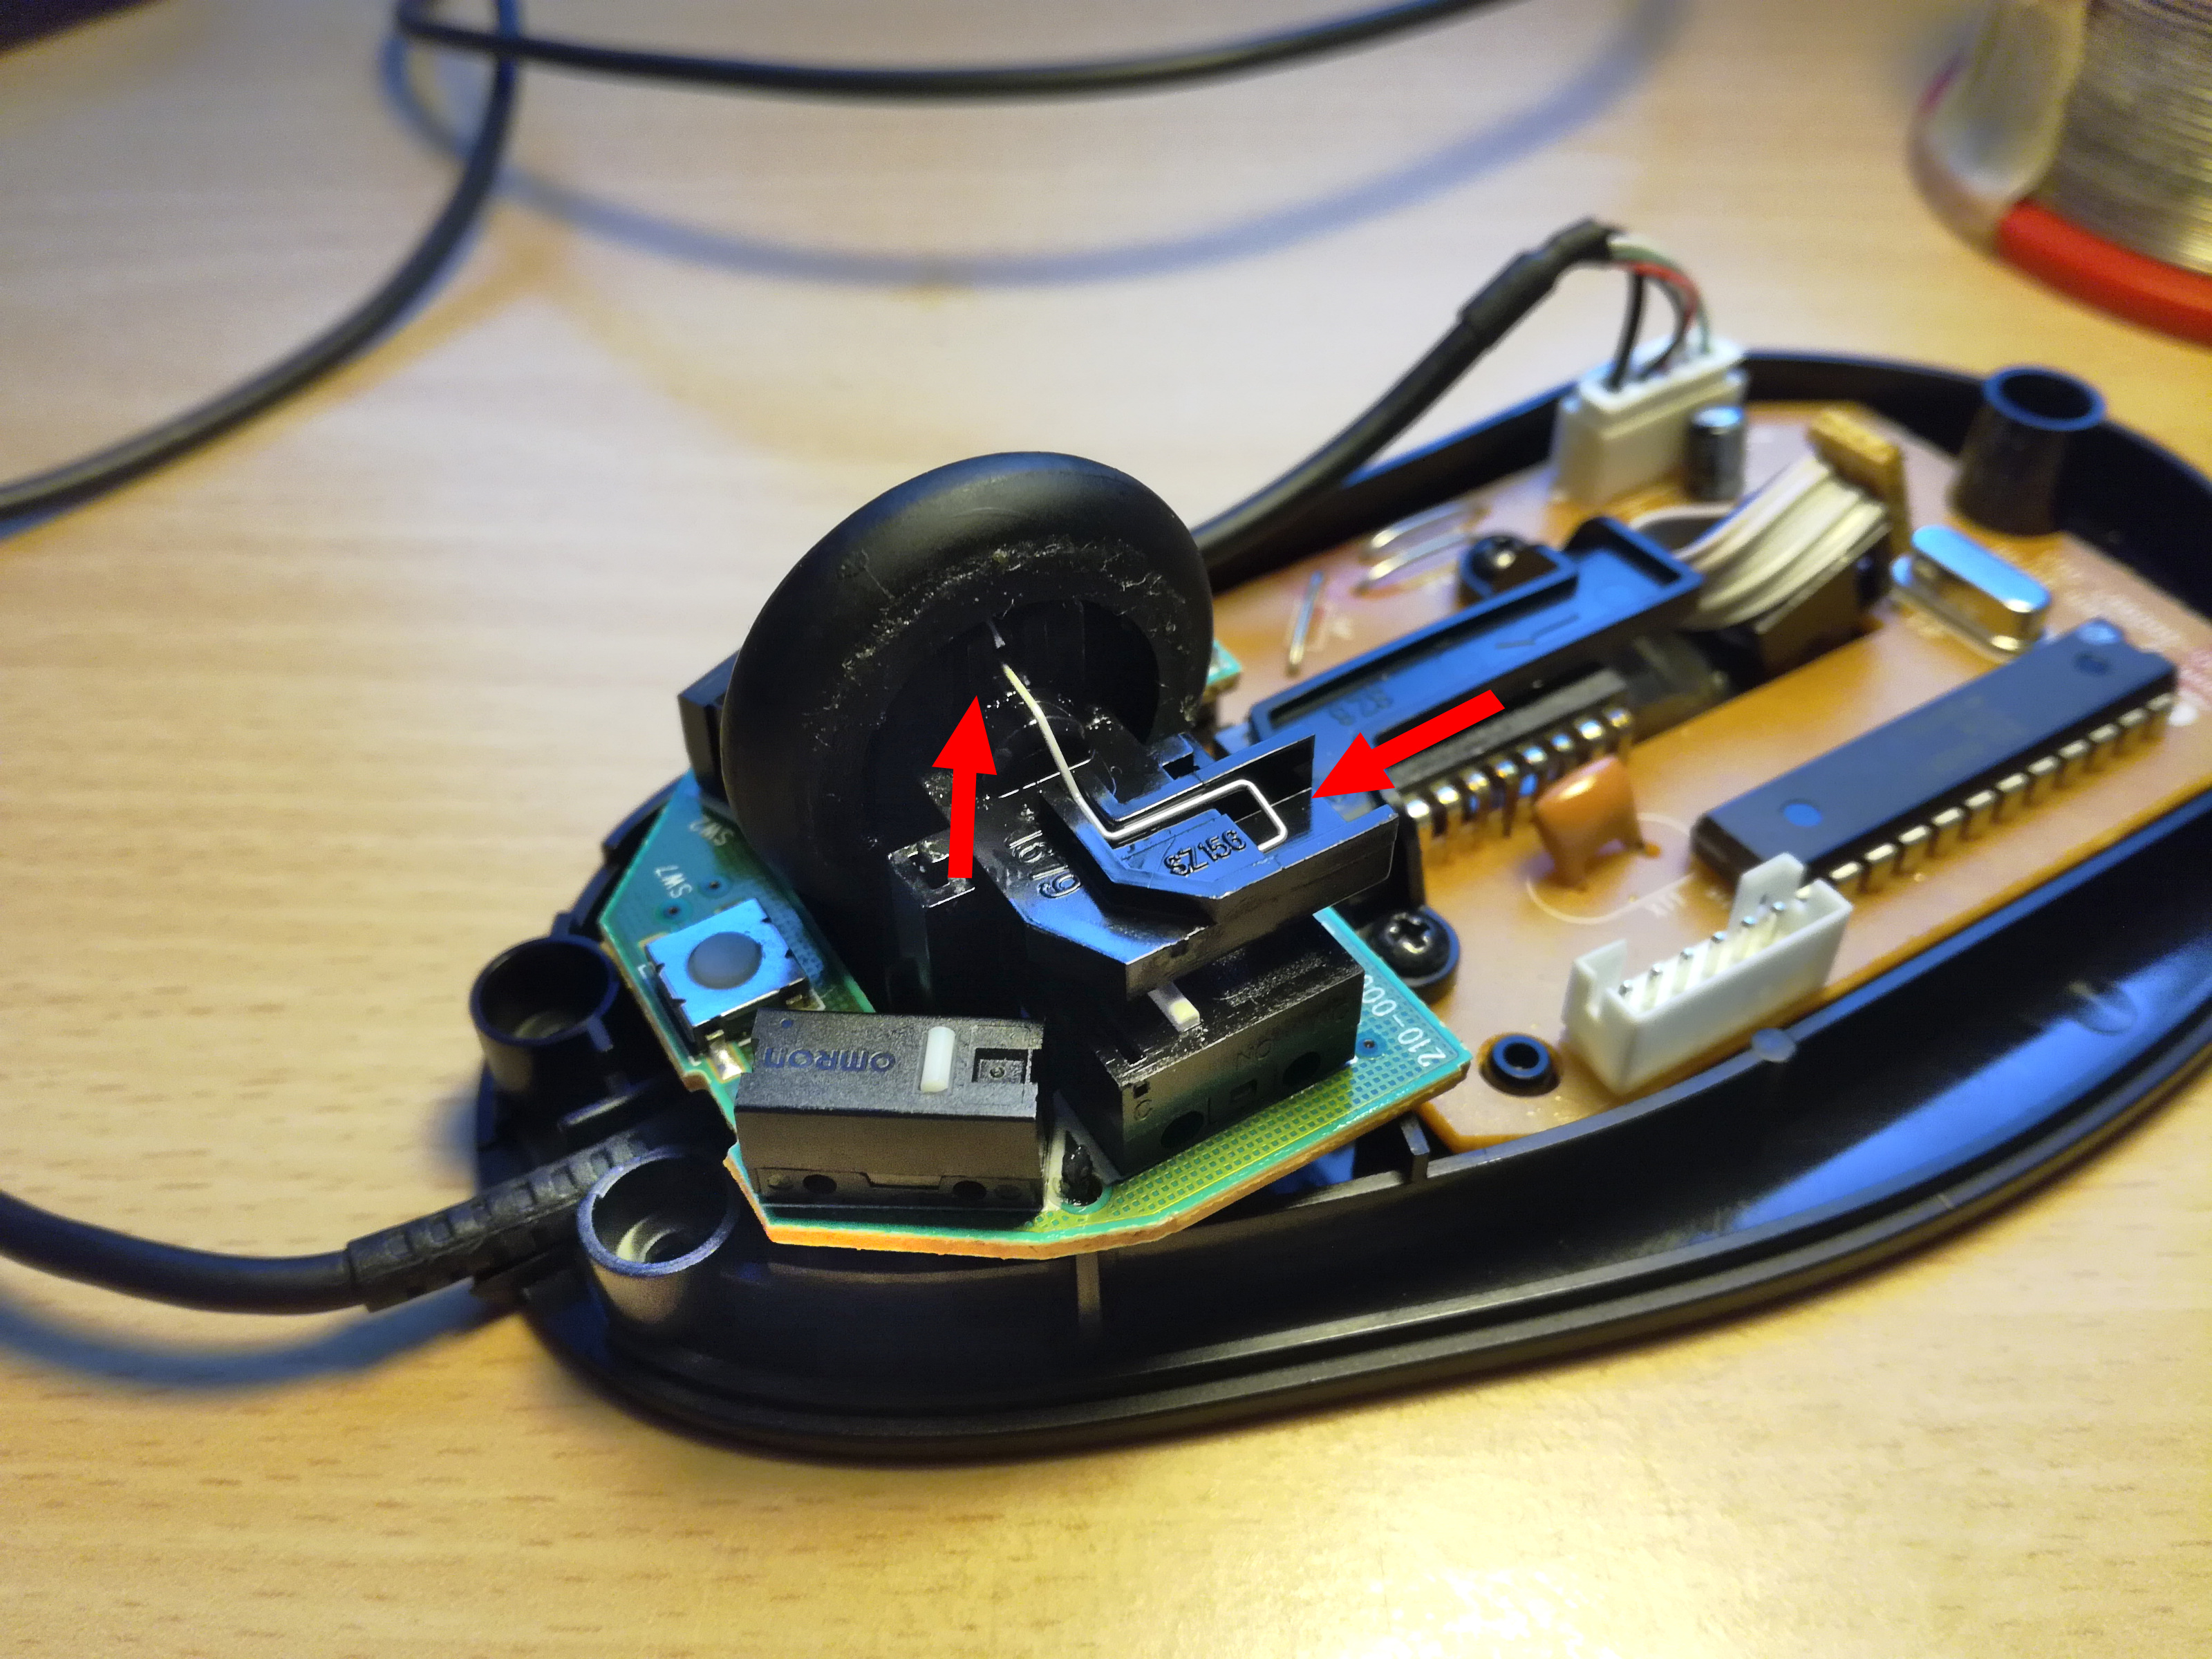
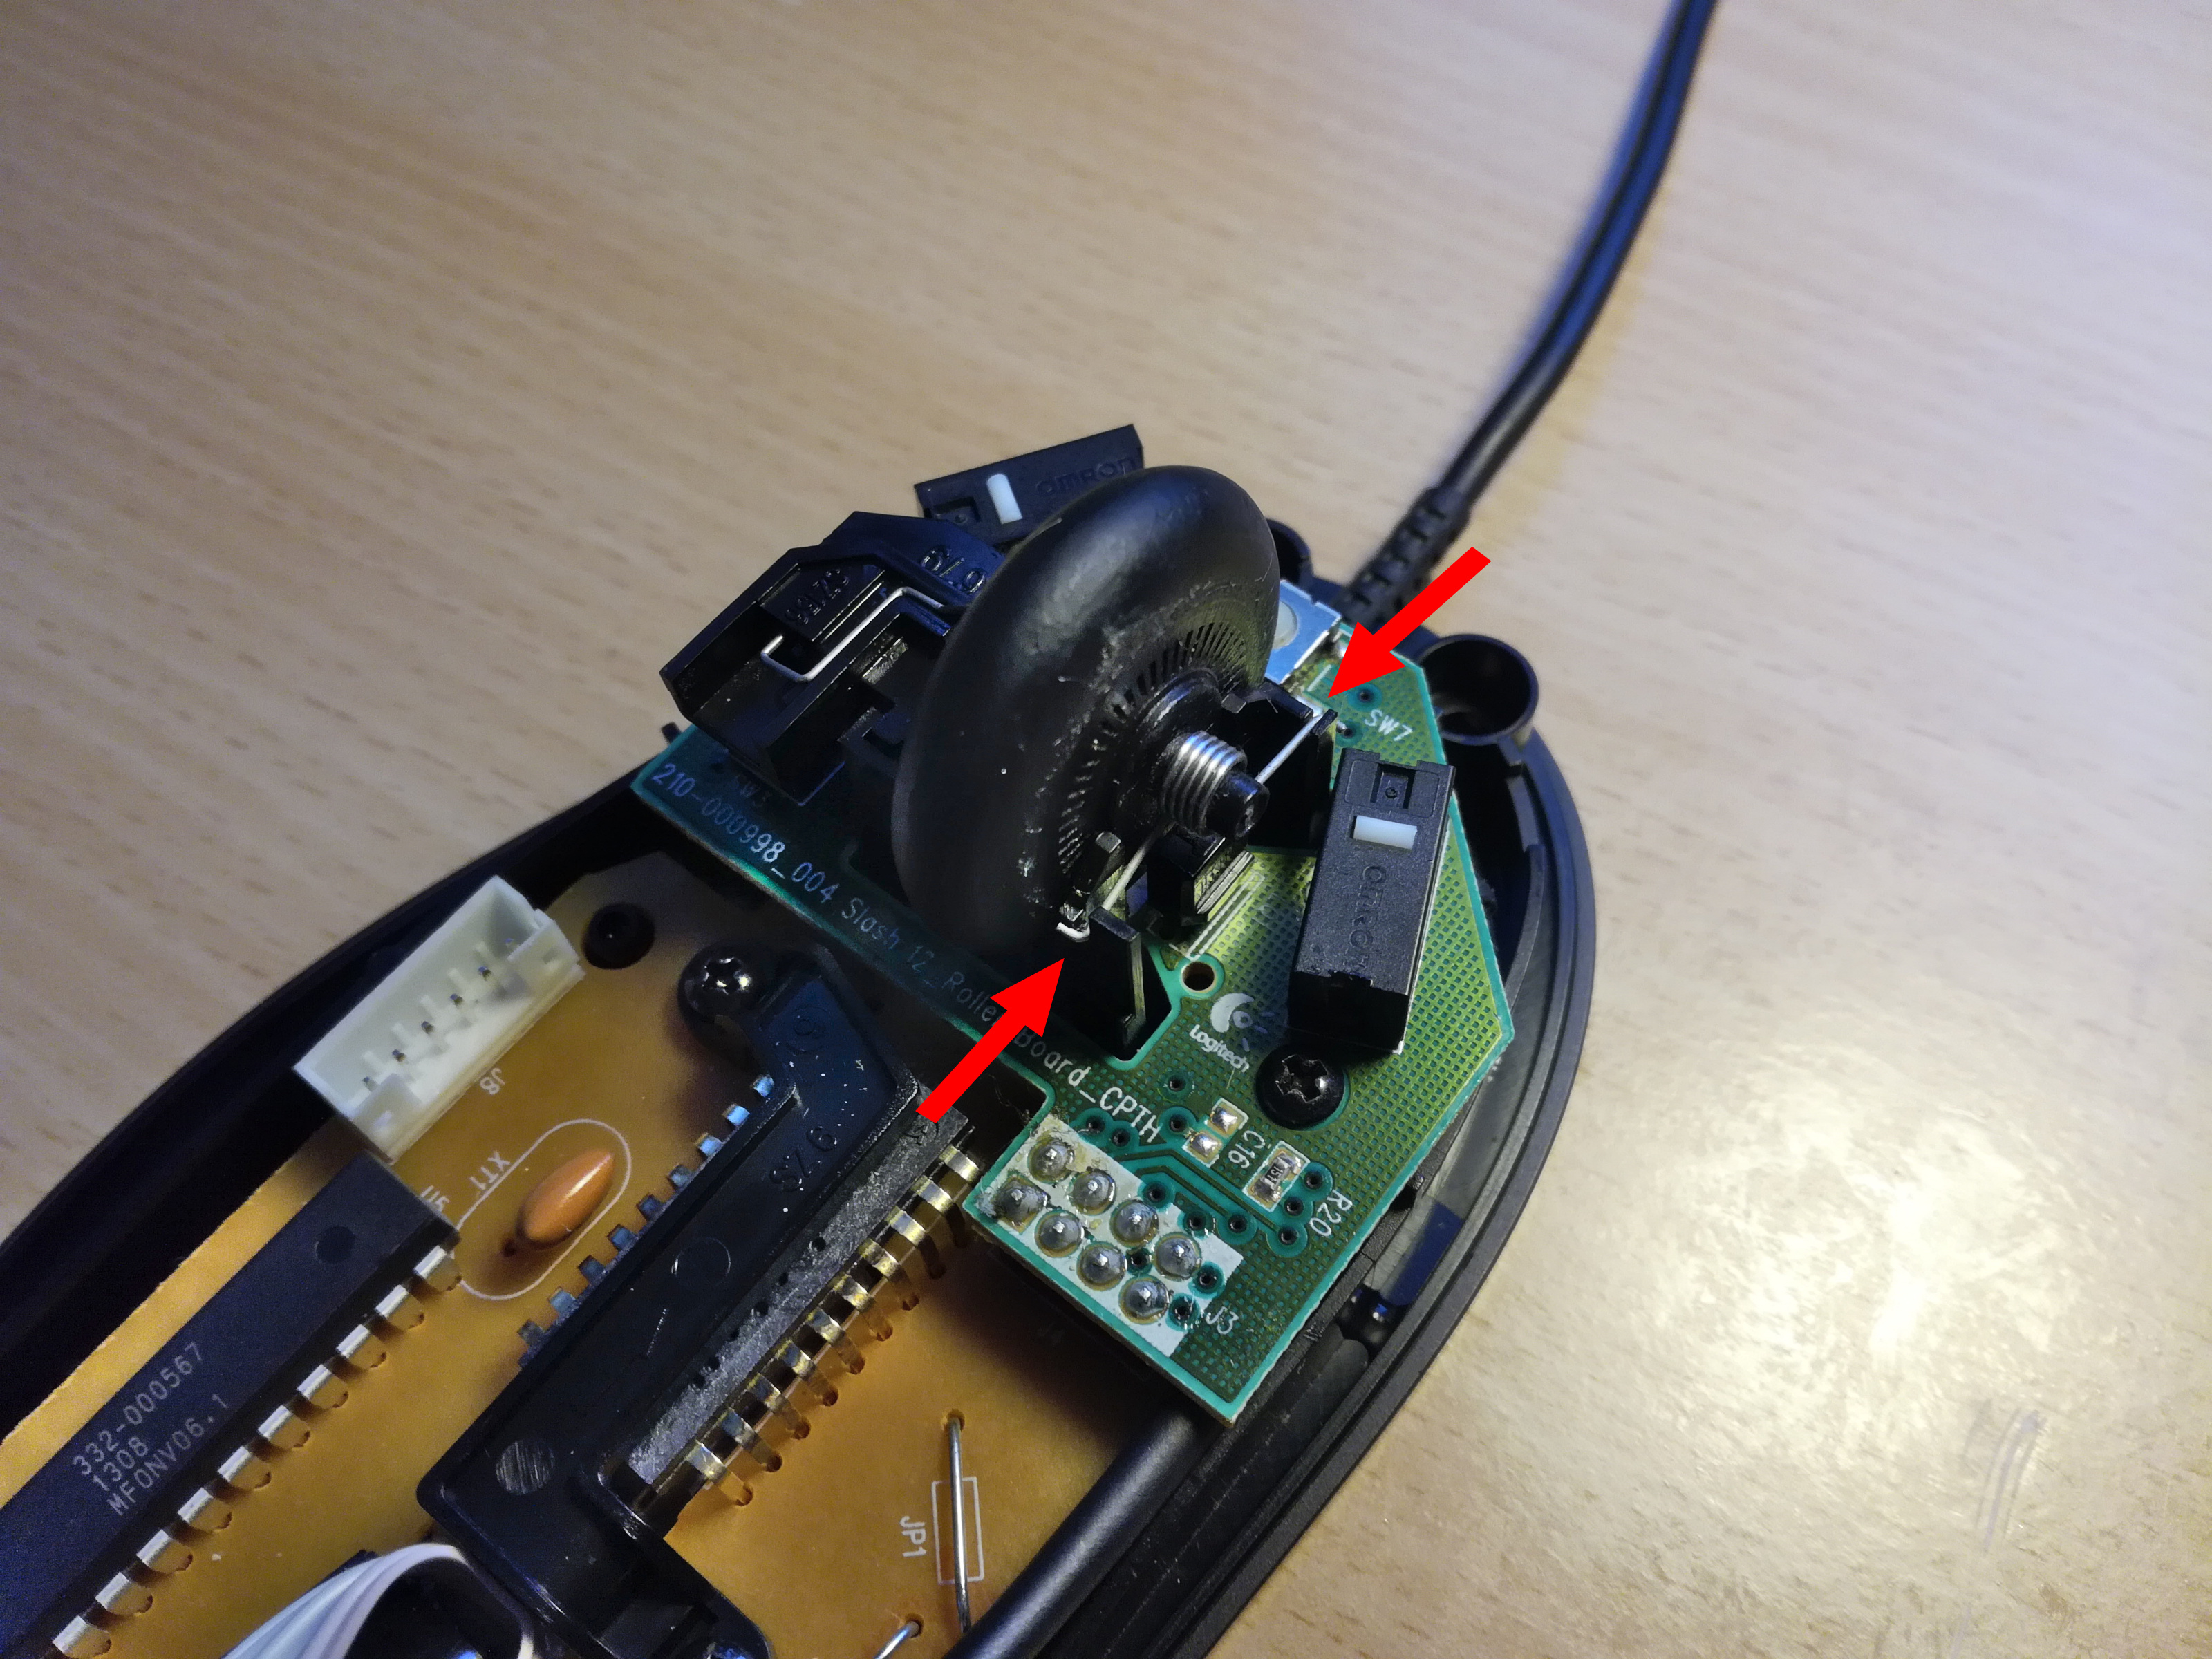
While installing the mouse wheel assembly, make sure that the spring and the "ticker" (?) are in correct place and orientation, as shown below images.
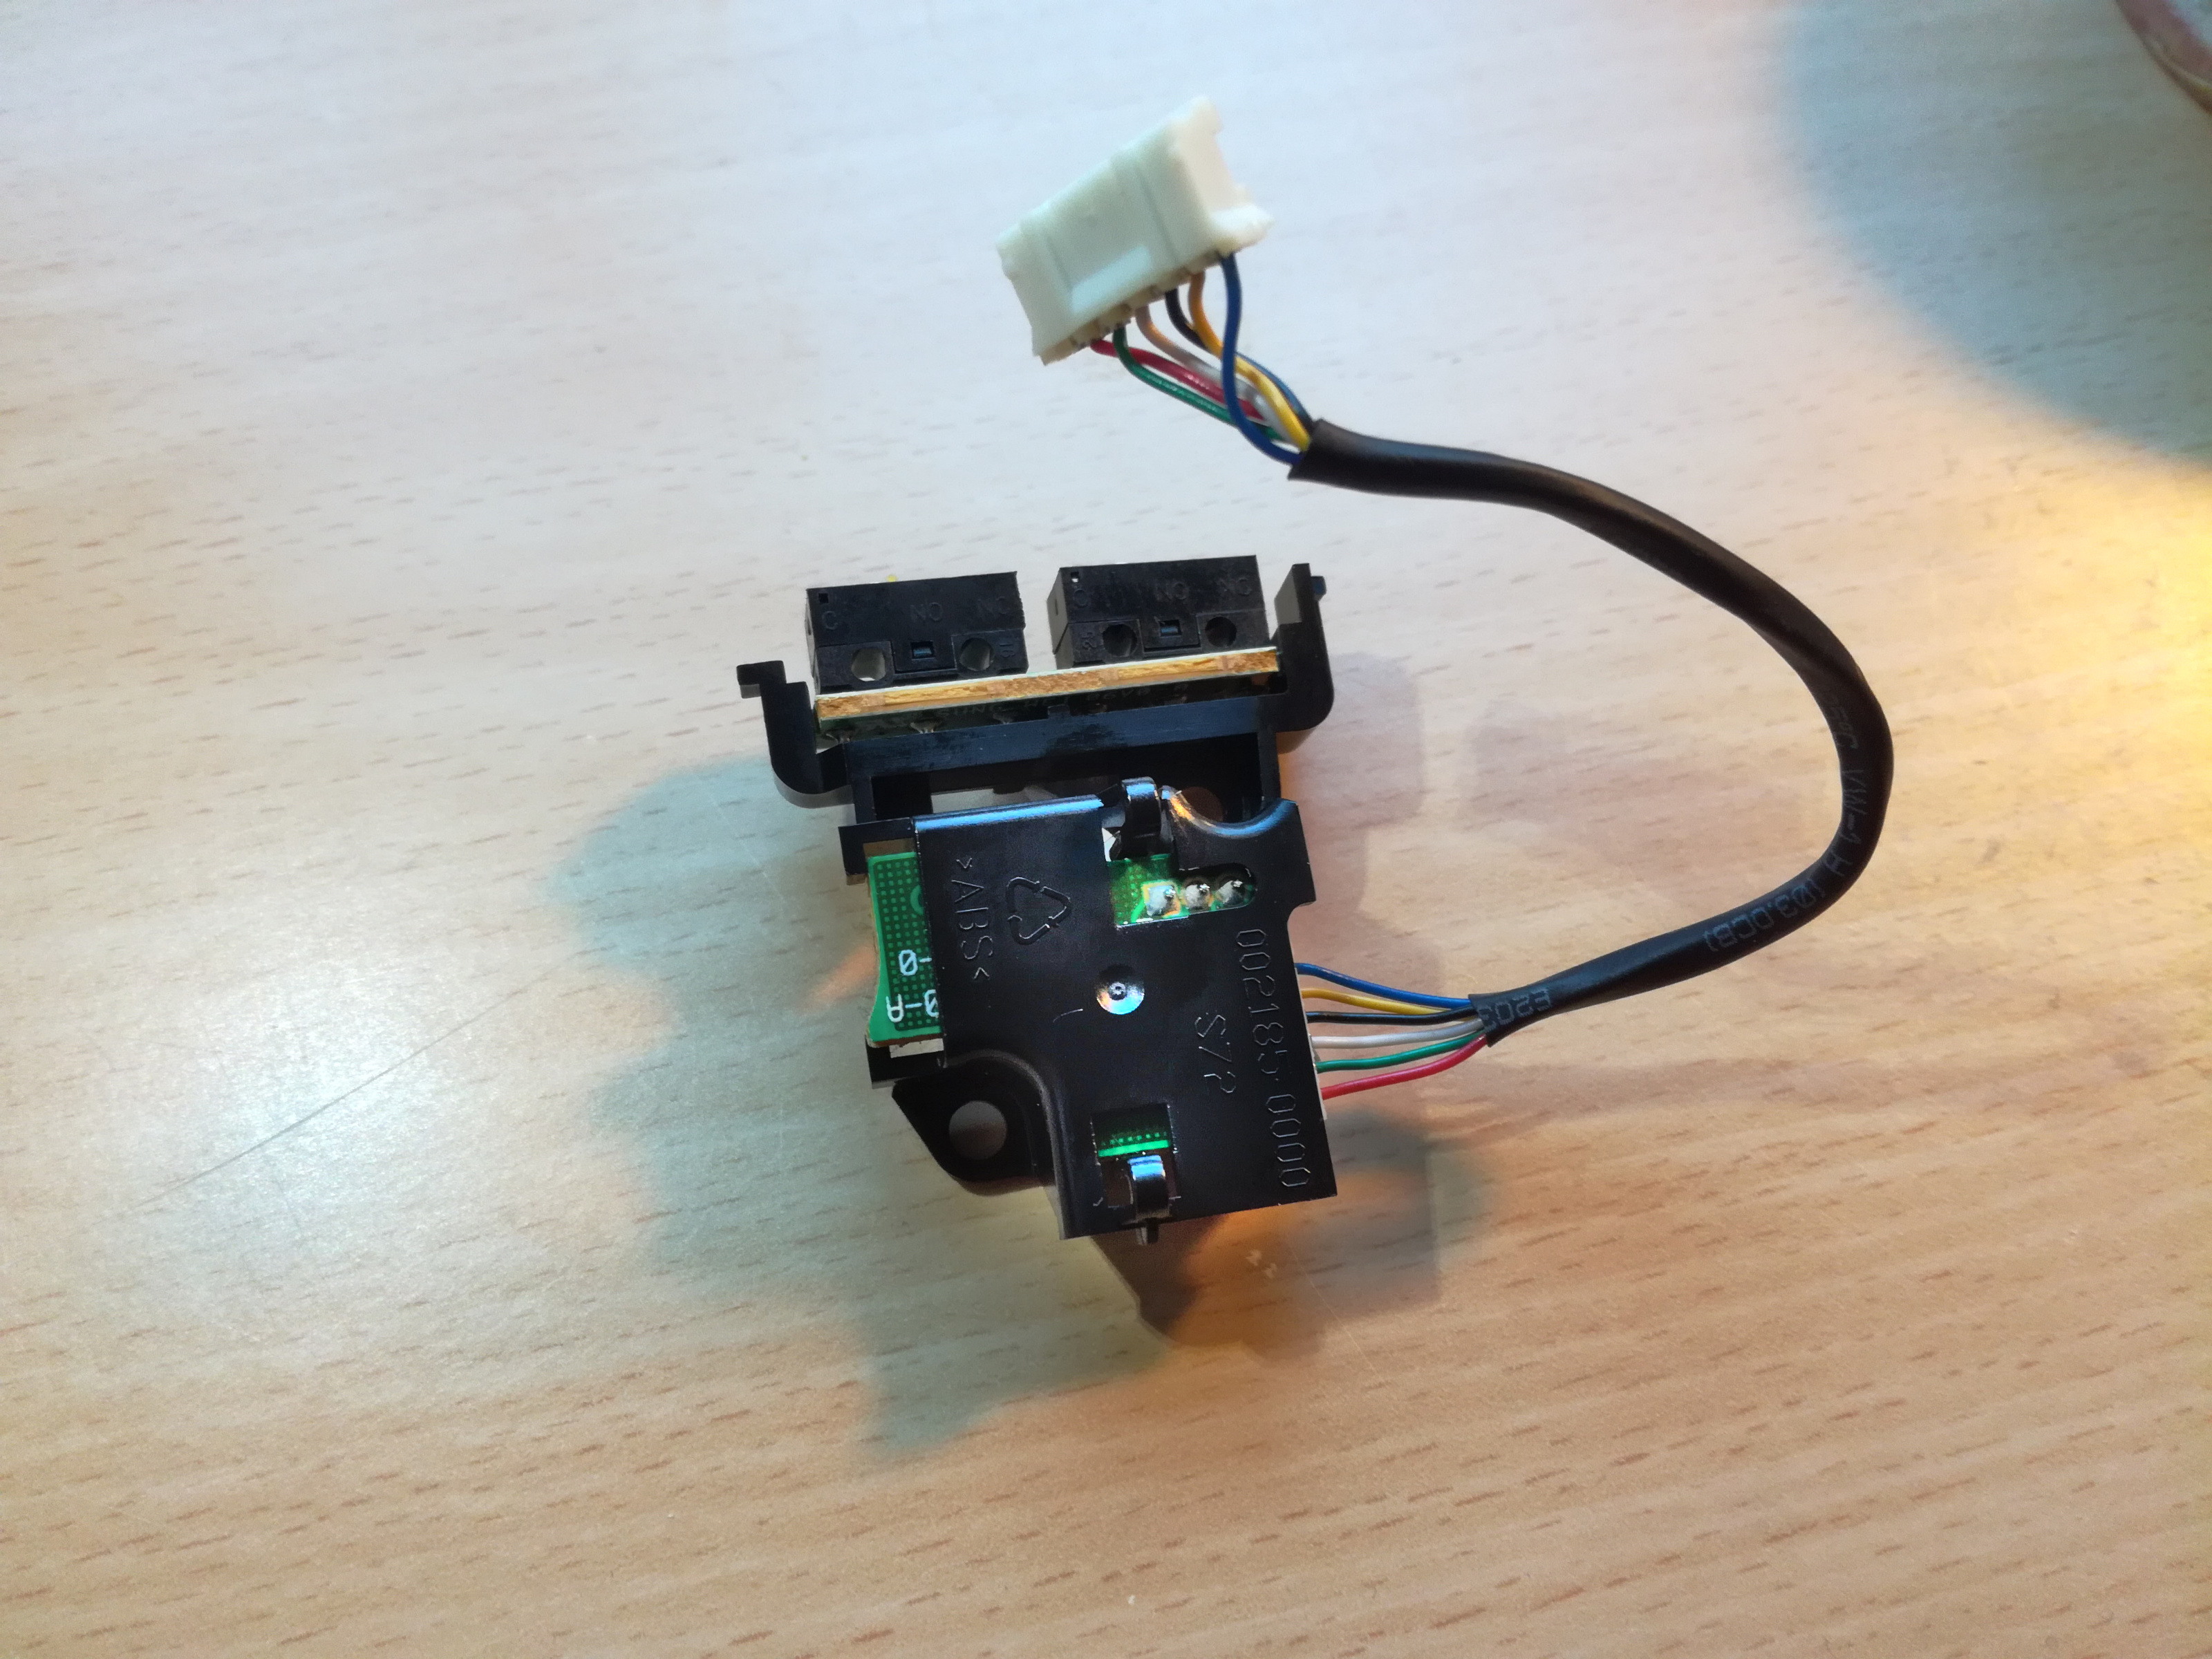
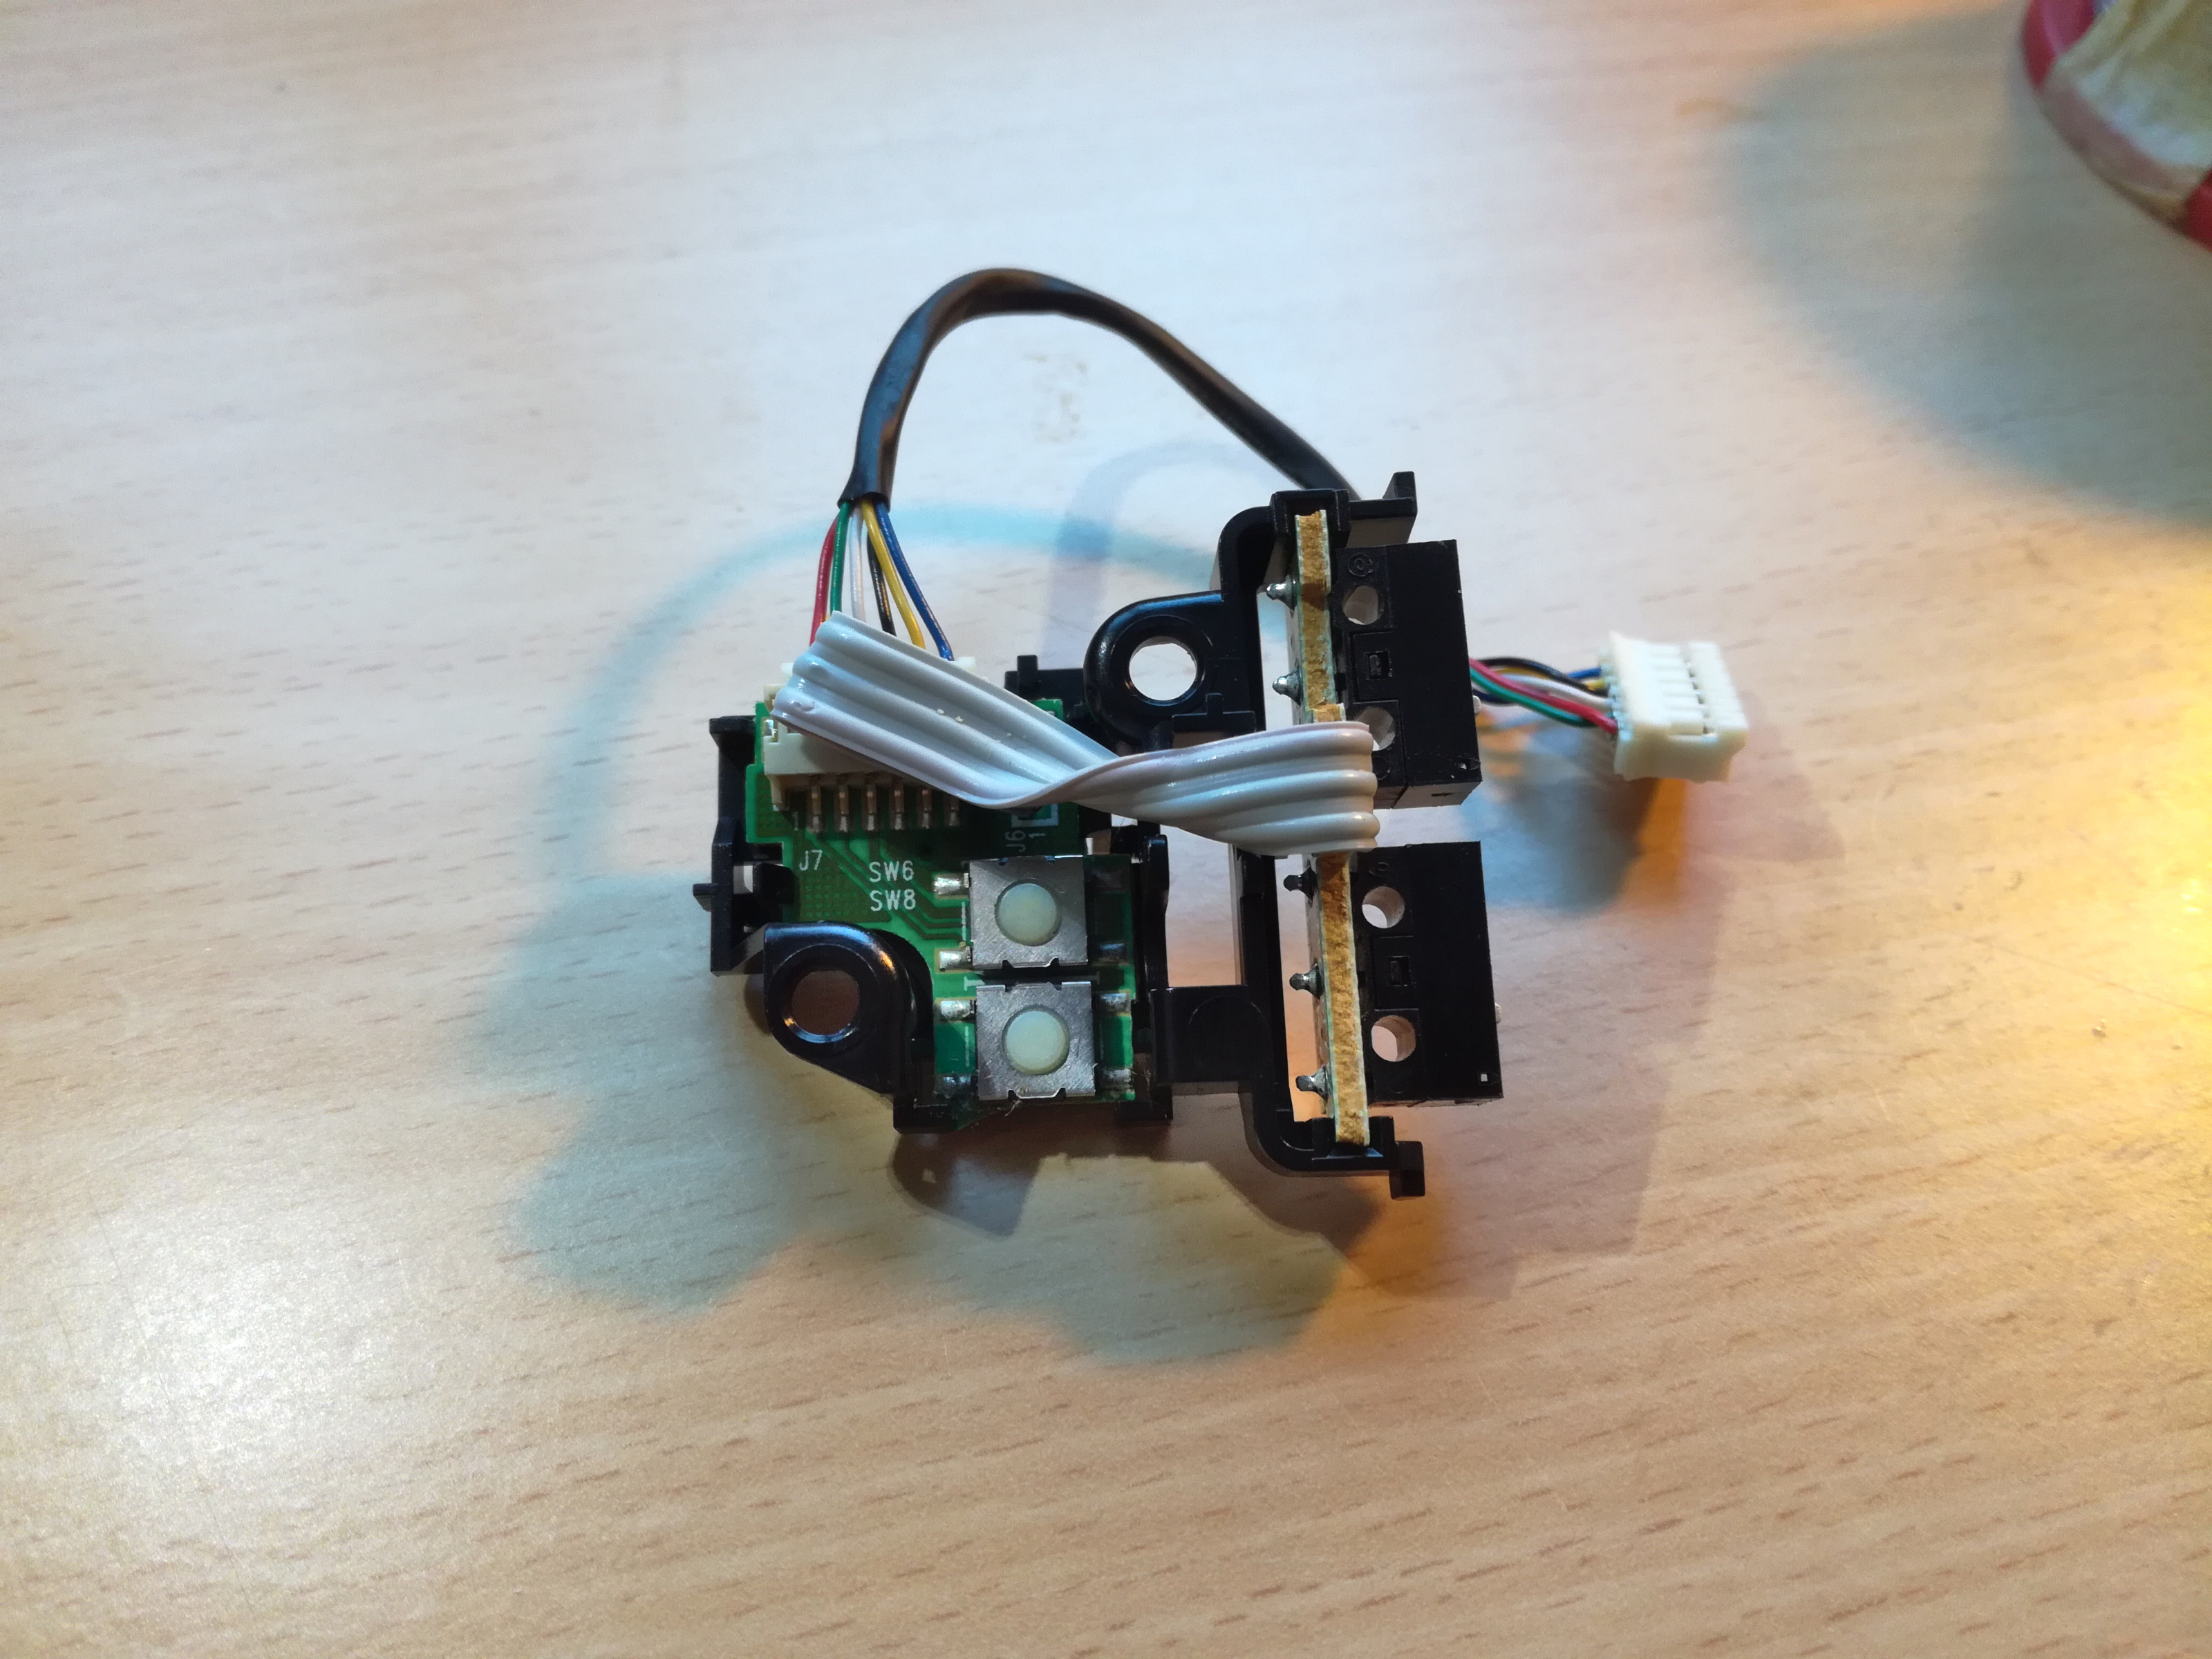
Additional images
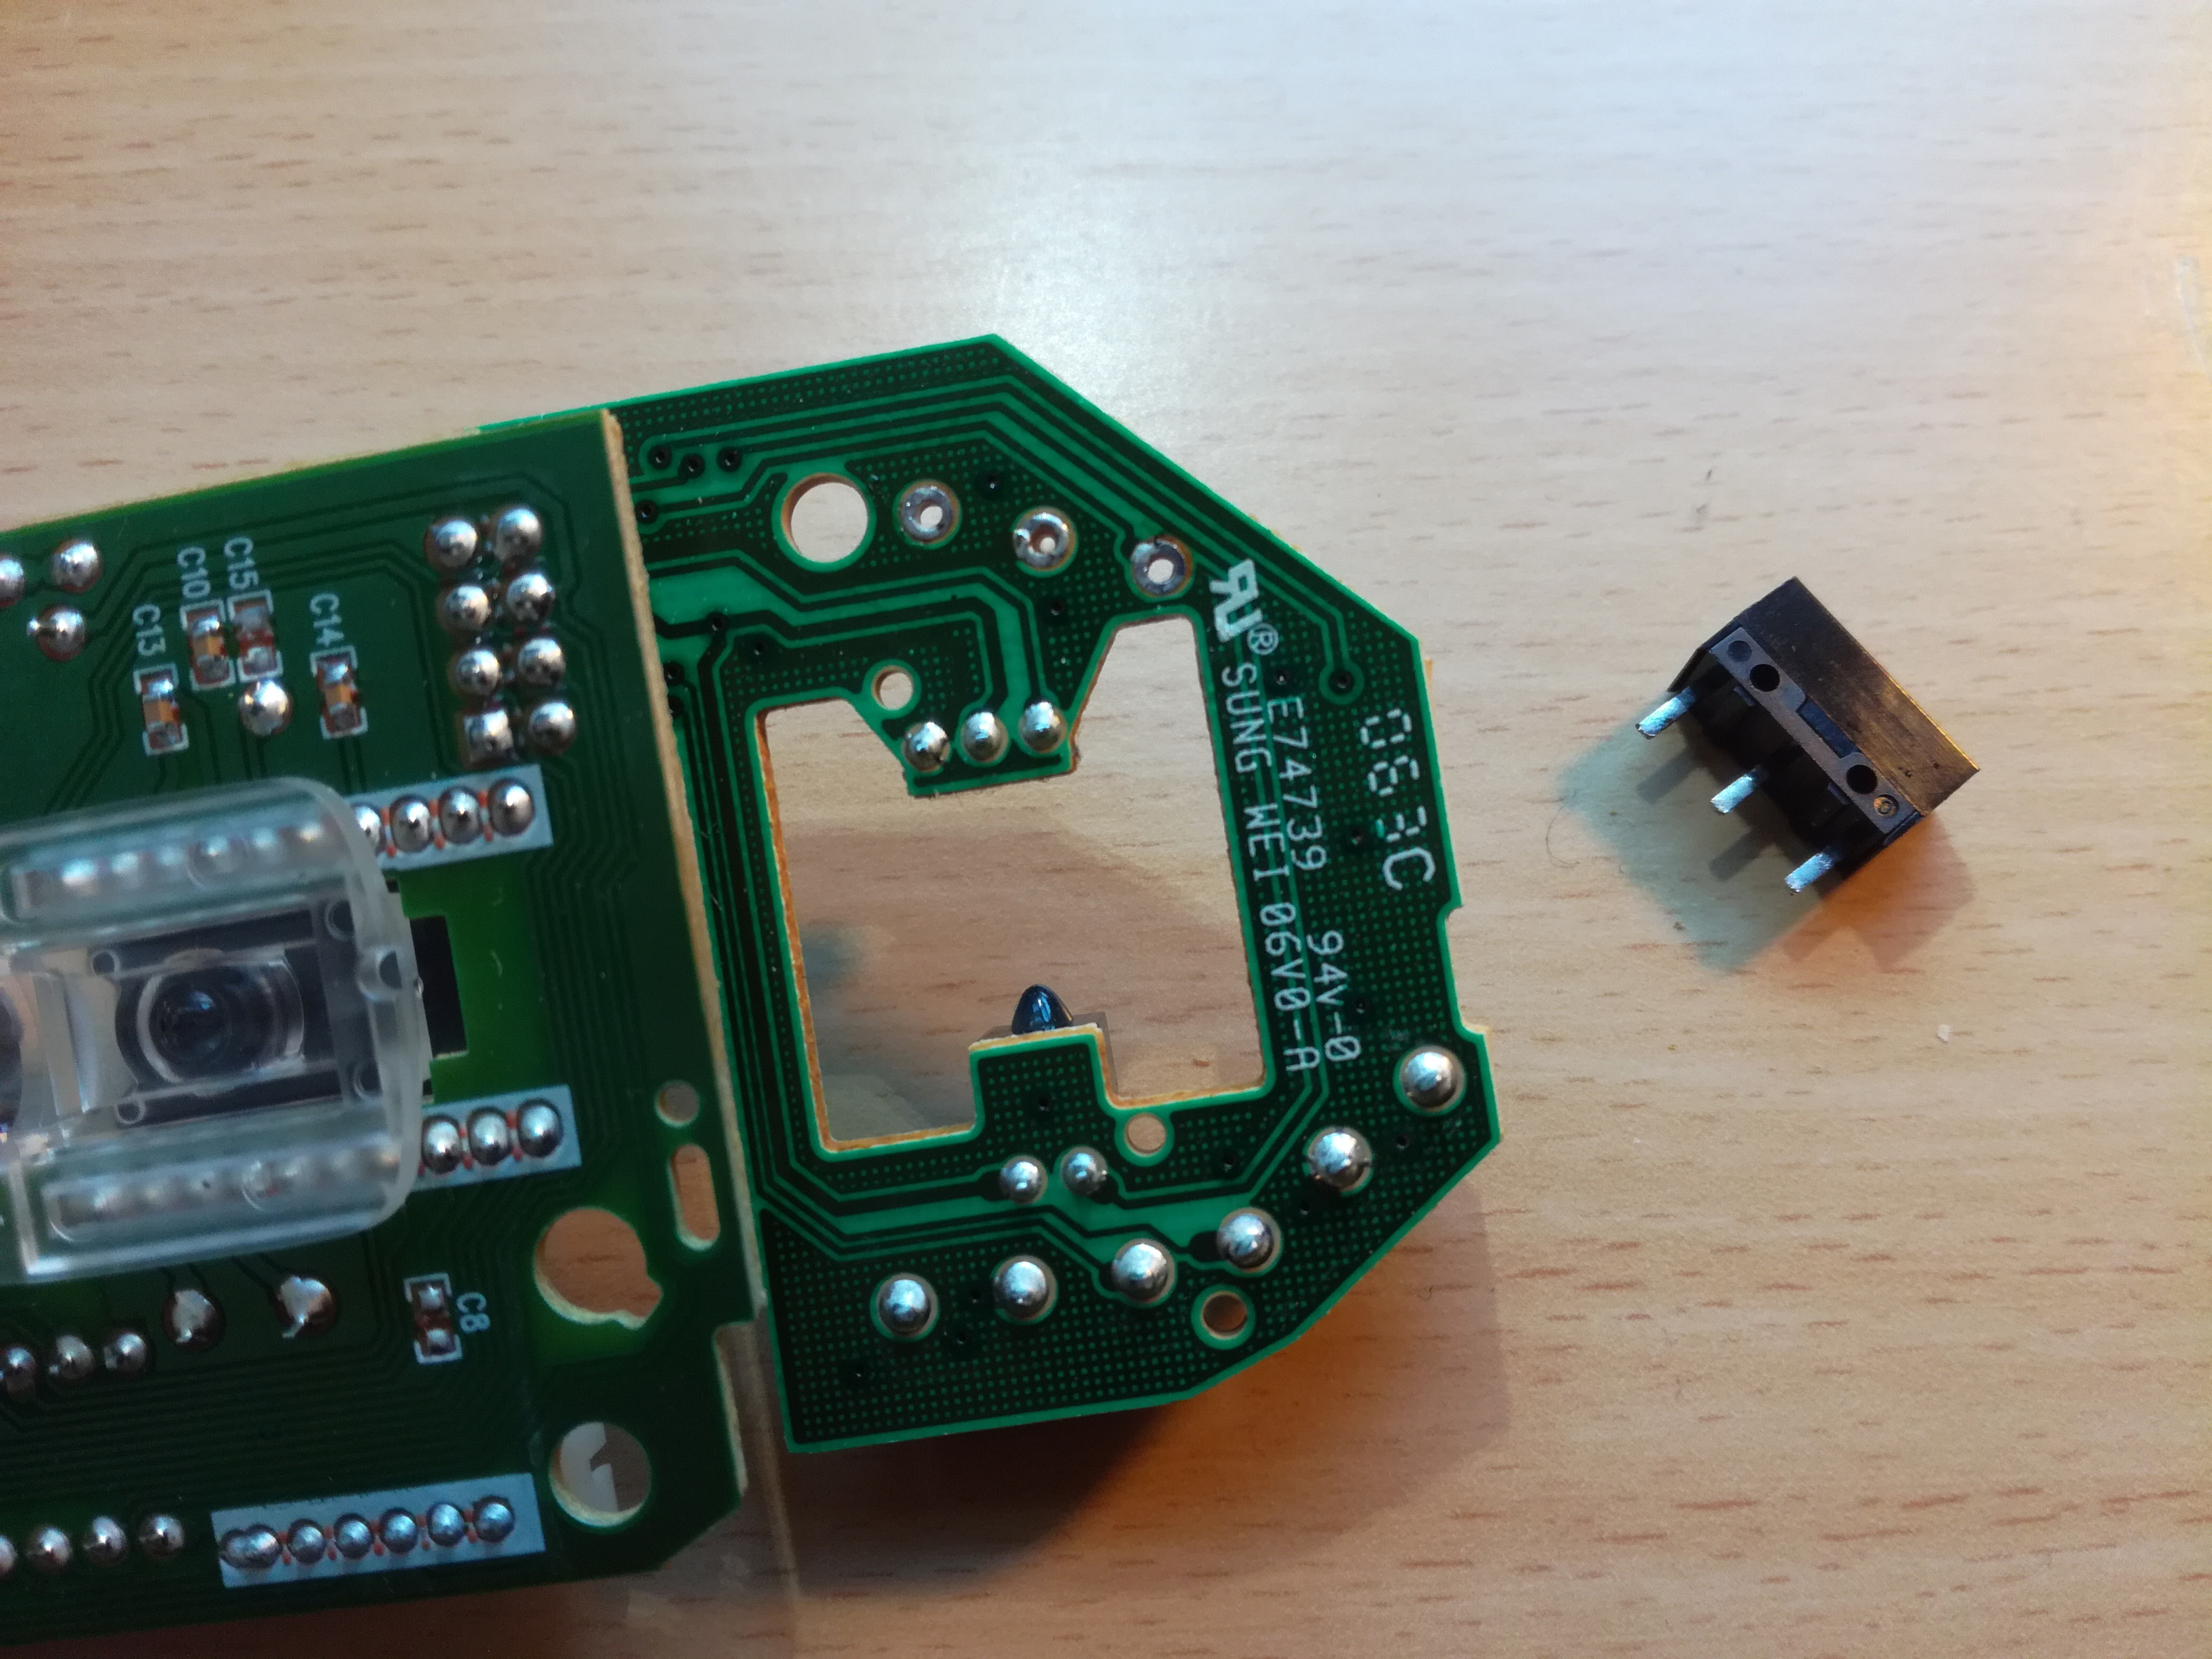
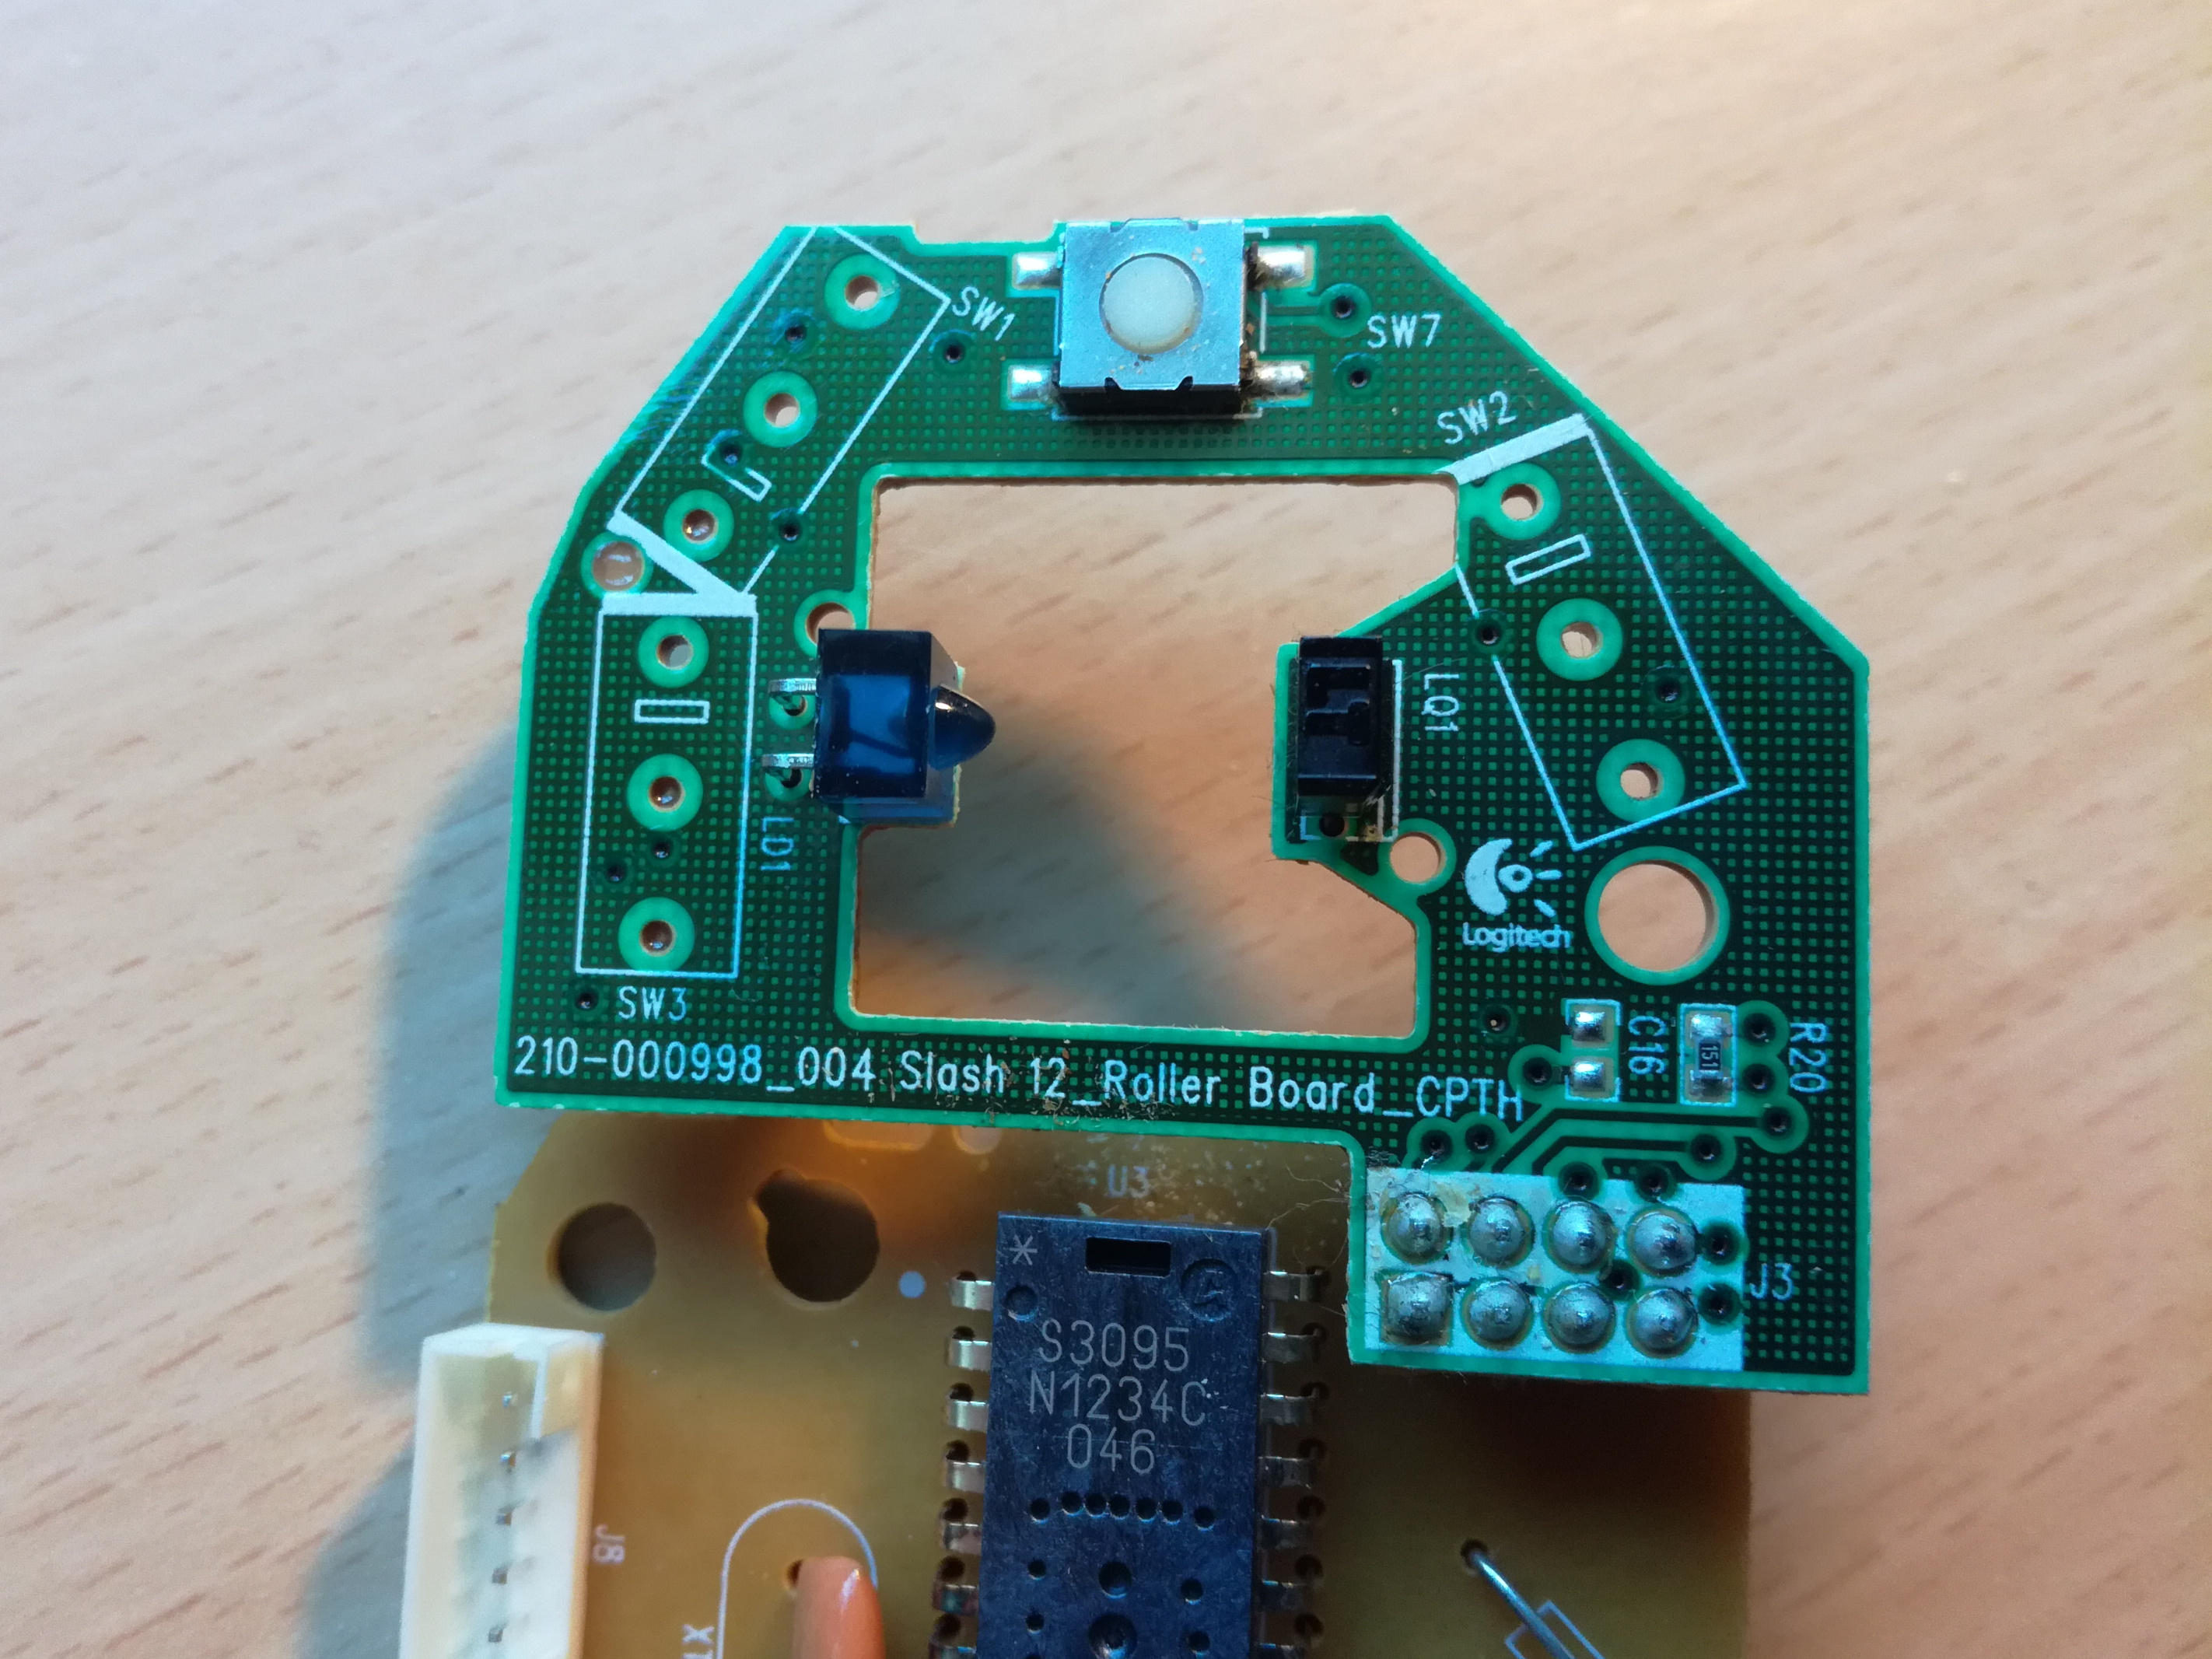
Images of the side/top-buttons PCB assembly.